


Tutorial · Architect 3D 26 for Windows
How to create a site plan with Architect 3D
Updated · About 7 minutes
Written for Architect 3D 26 for Windows. The Mac edition has similar tools, though some menu names differ.
The site plan is one of the key drawings in a set of permit plans. It shows the whole plot from above: its boundaries, levels and restrictions as they are today, and the buildings, extensions and outdoor works you plan. If you have already drawn your floor plans and roof plan, you can reuse them here.
Start from the plot plan (sometimes called a location or survey plan). Depending on where you live it comes from the land registry or cadastre, or from a surveyor.
Step 1: Import or trace the plot plan
Plot plans often come as a DWG file. Import it with File > Import DXF/DWG. Set the correct scale in the import dialog. If the drawing uses colours, choose the option to use the imported geometry colours so it looks the same as the original.
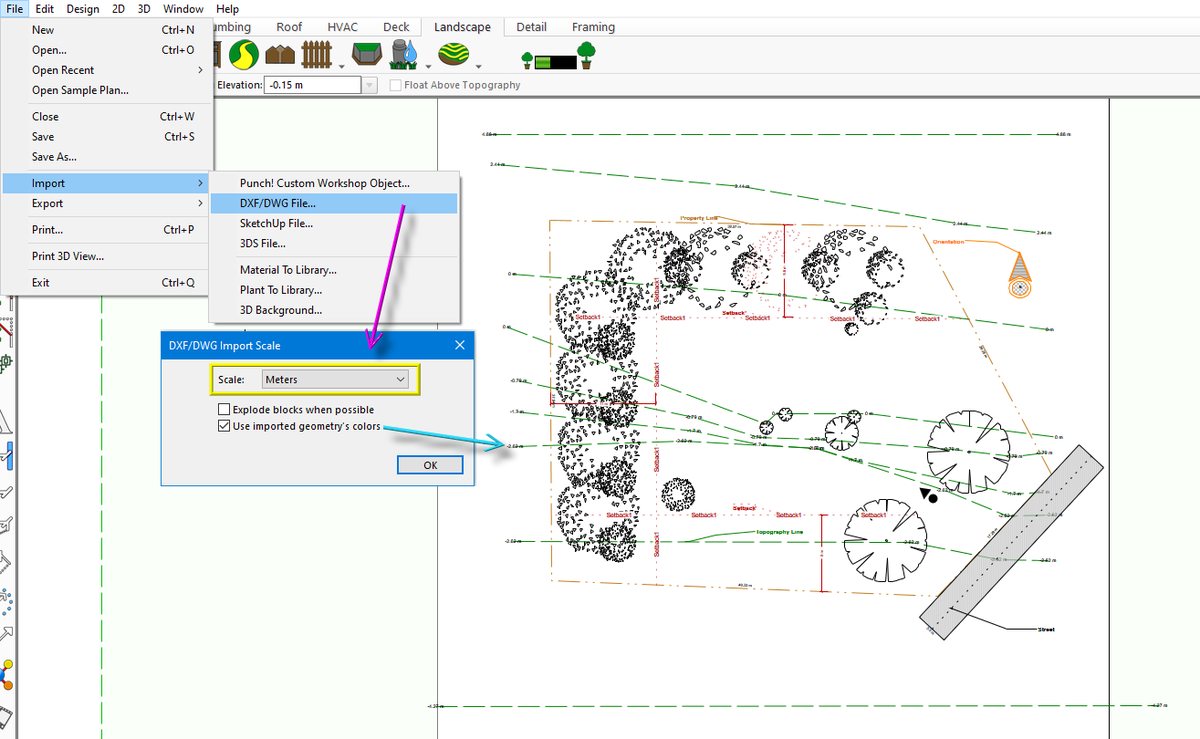
A typical plot plan shows the property lines, topography lines for the ground levels, setbacks (how close to the boundary you may build), existing planting, the street and north. What it contains varies from place to place.
If your plan is an image (JPG, PNG or BMP), import it through Design > Floor Plan Trace Properties and trace over it.
Step 2: Turn the lines into site elements
Convert the imported lines into Architect 3D elements so they behave like the real thing:
- Select a contour line, then on the Properties tab choose Convert To > Topography Line and enter its elevation.
- Select the boundary and choose Convert To > Property Line, or convert it to a fence.
- Leave the setback lines as they are and use them as guides.
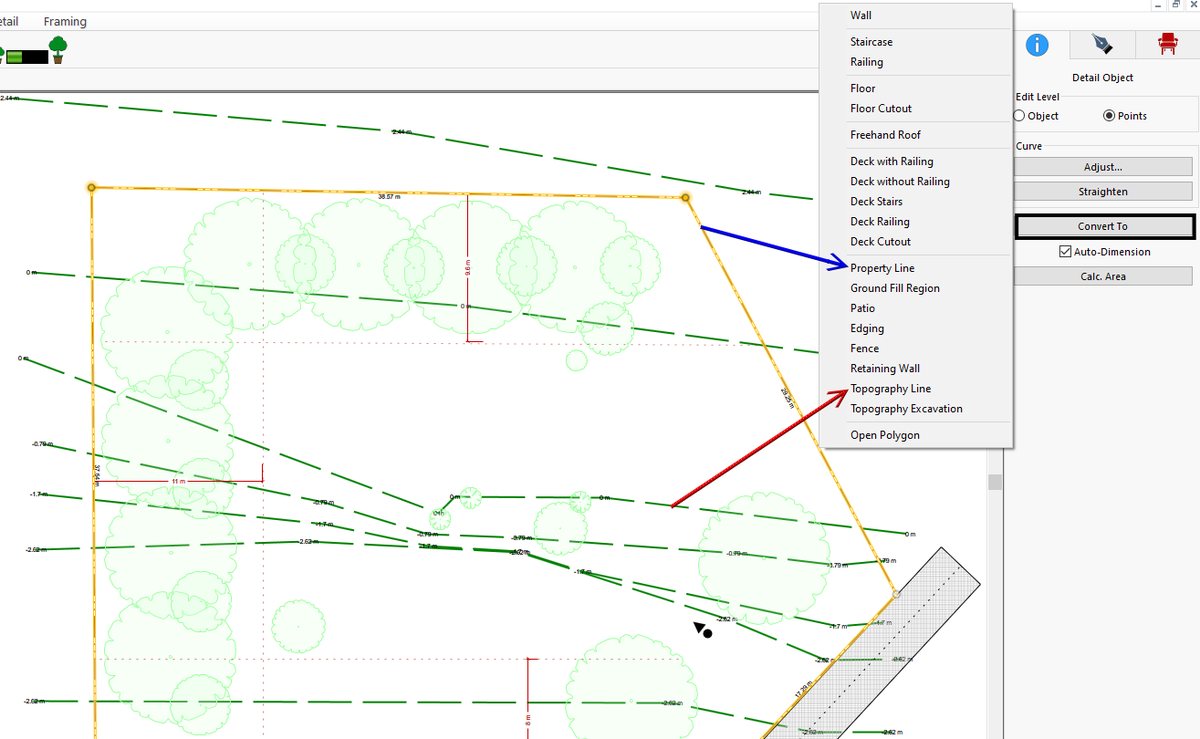
The plot now shows its existing conditions and restrictions.
Step 3: Add the house and outdoor areas
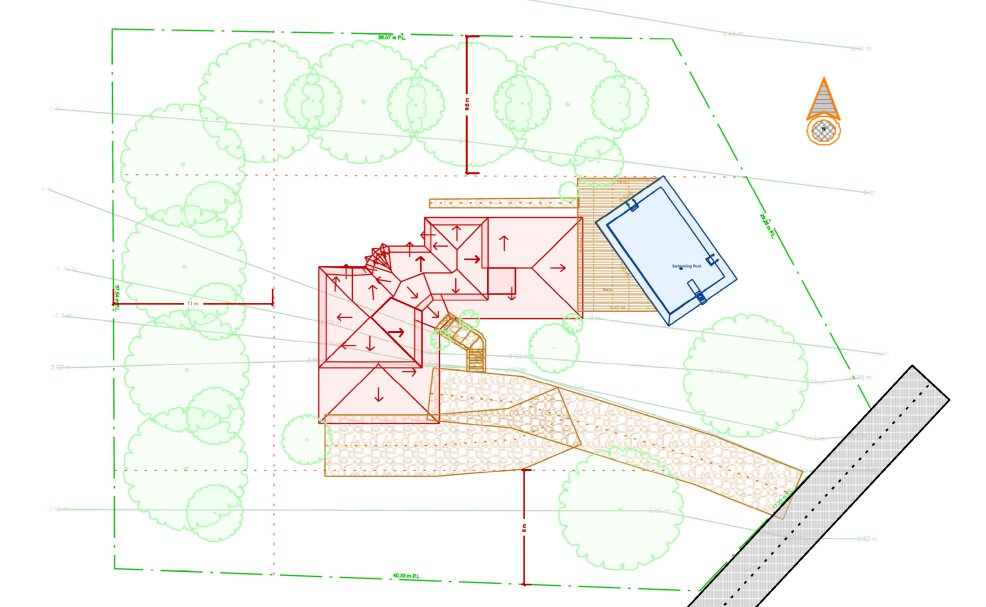
- Add the house. Here the roof plan of the house is placed inside the setback lines.
- Draw paths, terraces and outdoor steps with the Pathway/Driveway and Patio tools on the Landscape tab. Stairs are on the Deck and Floor tabs.
- Add a pool if you plan one: a ready-made pool from the library, or a custom pool drawn with the Pool Designer (included in Ultimate, Platinum and Landscape Design).
- Set the elevation of each element, using the topography lines as your guide.
Step 4: Present it in 3D
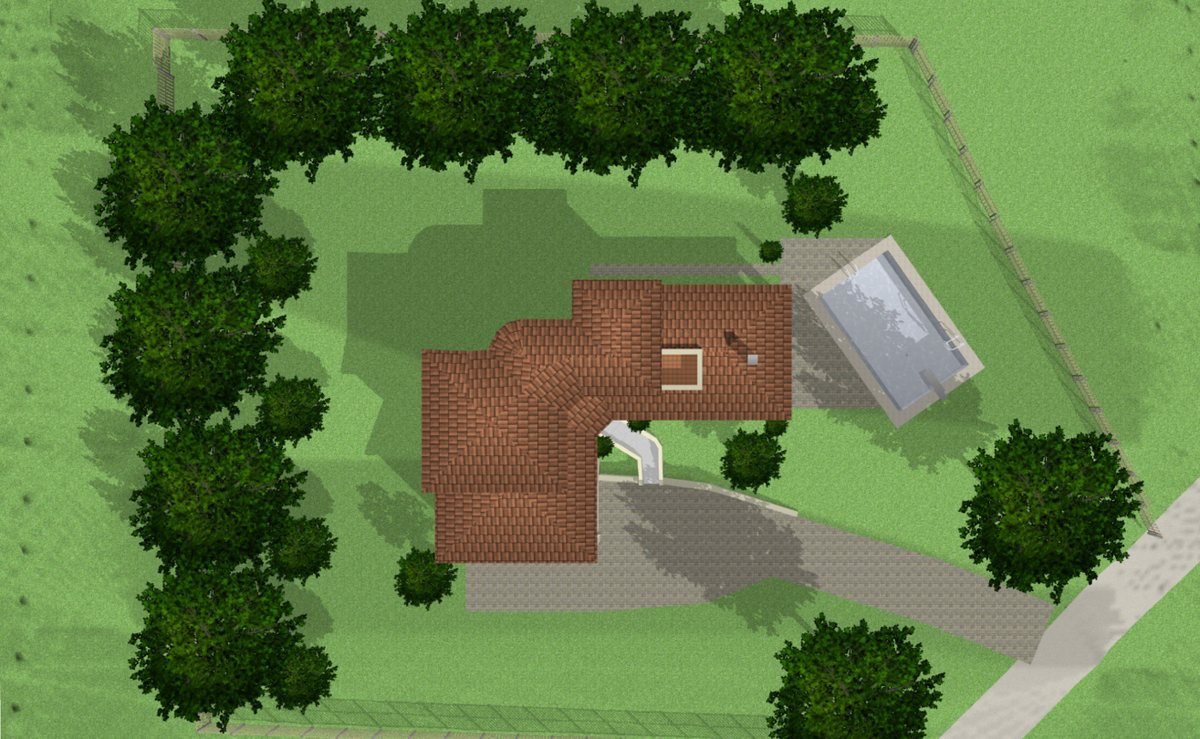
To show the site plan as an aerial view, open the full 3D view and use Animated Fly-Around to look down on the plot from above.
Ask your local planning office which drawings and details your application needs. For ground levels, see how to draw a topographical plan.