Tutorial · Architect 3D 26 for Windows
A design assistant, construction tools and libraries to create your house
Updated · About 5 minutes
Written for Architect 3D 26 for Windows. The Mac edition has similar tools, though some menu names differ.
Architect 3D gives you help at every stage of a project: QuickStart to get started, construction tools on a set of plan tabs to build the house, and libraries of objects, materials and colours to furnish and decorate it.
Step 1: Build the house wall by wall
- When QuickStart opens, click Continue.
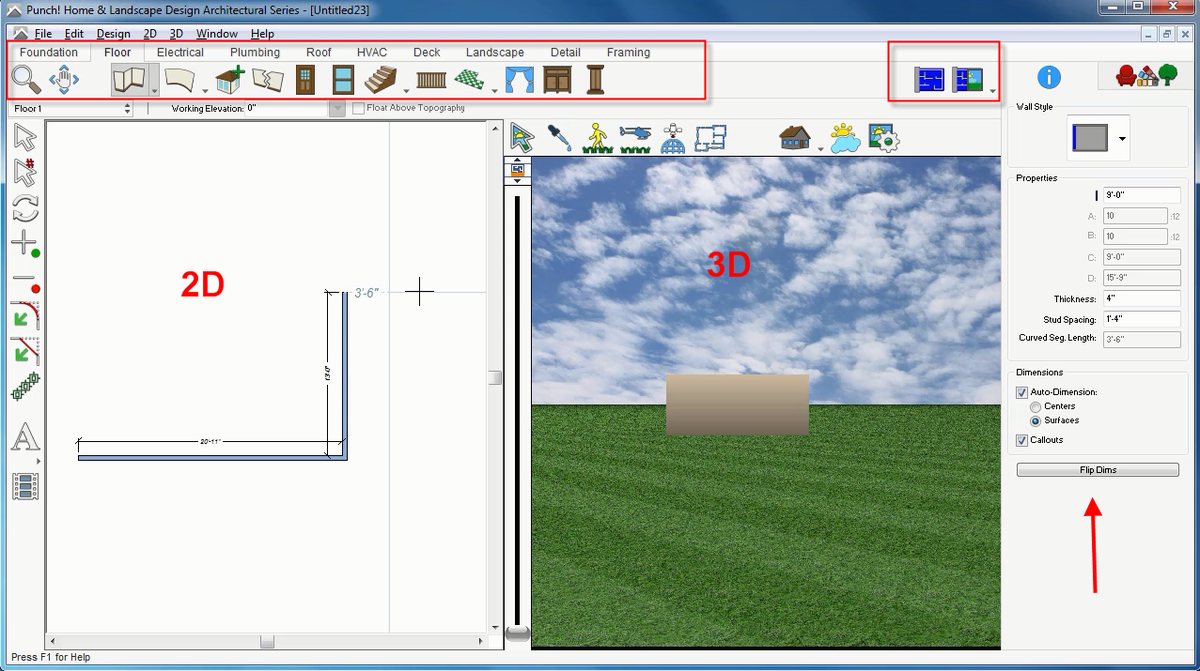
- Click the split 2D/3D view icon to see your plan in 2D and 3D at the same time.
- On the Floor tab, click the Wall tool, click in the design window and drag. Release when the wall is long enough.
- Repeat for each wall; corners join automatically. Click Animated Fly-Around to turn the design in 3D.
Step 2: Or room by room
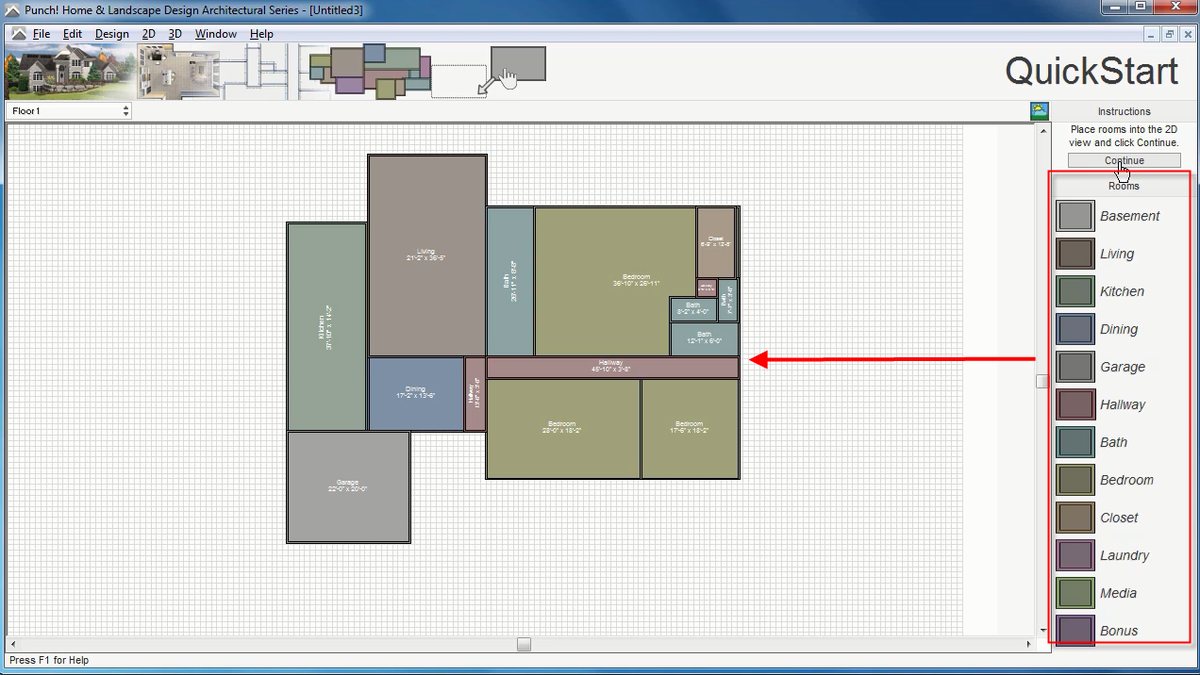
- In QuickStart, drag room types from the list on the right into the design window.
- Resize each room by its corners.
- Click Continue to switch to the design window.
Step 3: Use a tool: placing a door
- Click the plan tab you want to work on, here the Floor tab.
- Select a tool, here the Door tool.
- Configure it on the Properties tab on the right if needed. The hint for each tool explains how to use it on the plan.
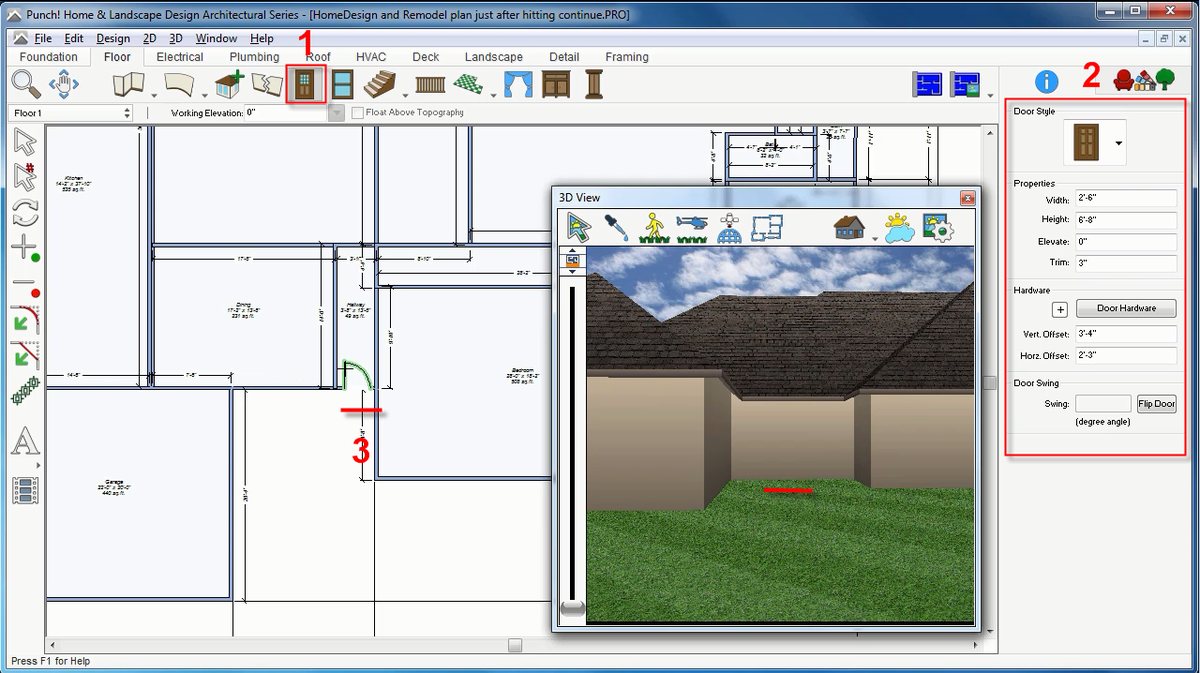
Step 4: Furnish the interior
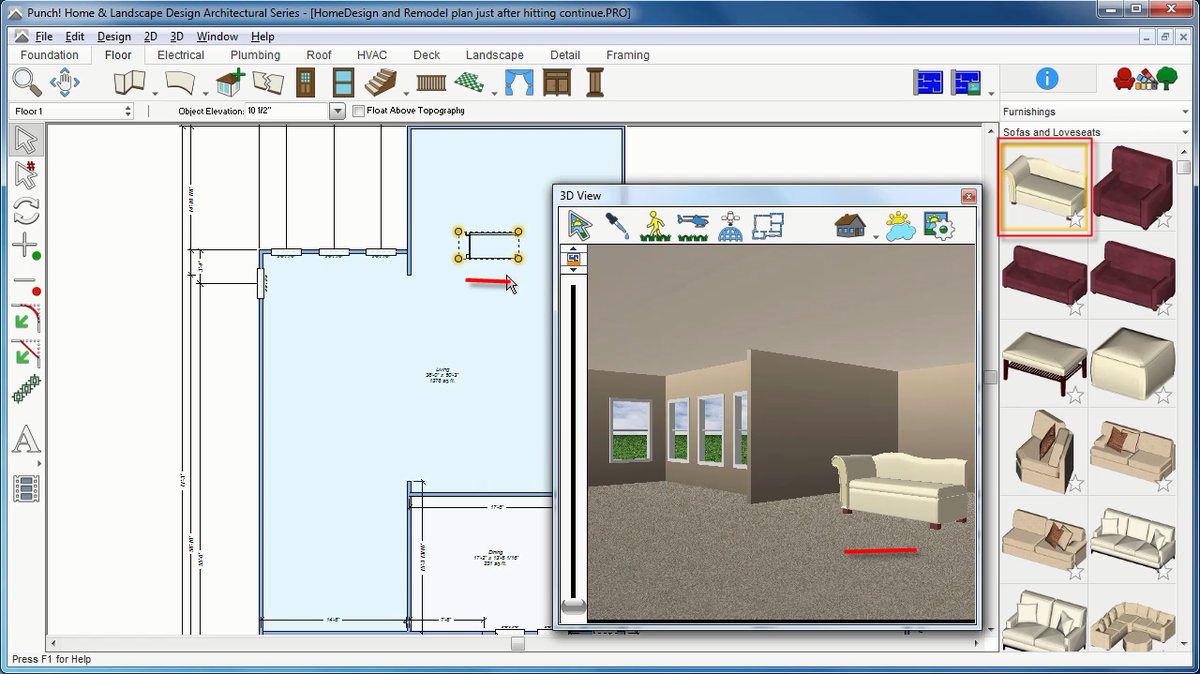
- Click the Libraries tab and choose the Objects library from the menu.
- Pick a library and category from the categories menu. The contents appear in the preview bar.
- Drag the item you want straight into the 3D view. Adjust its position on the 2D plan if needed.
Step 5: Paint the walls
- Switch to the full-screen 3D View.
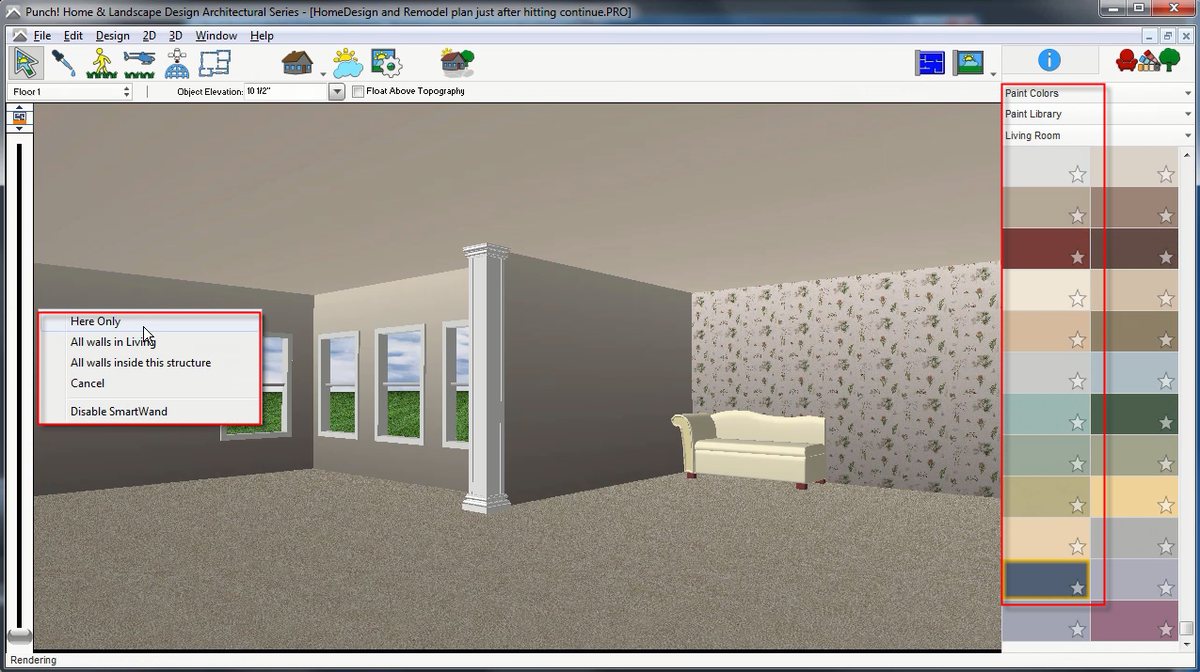
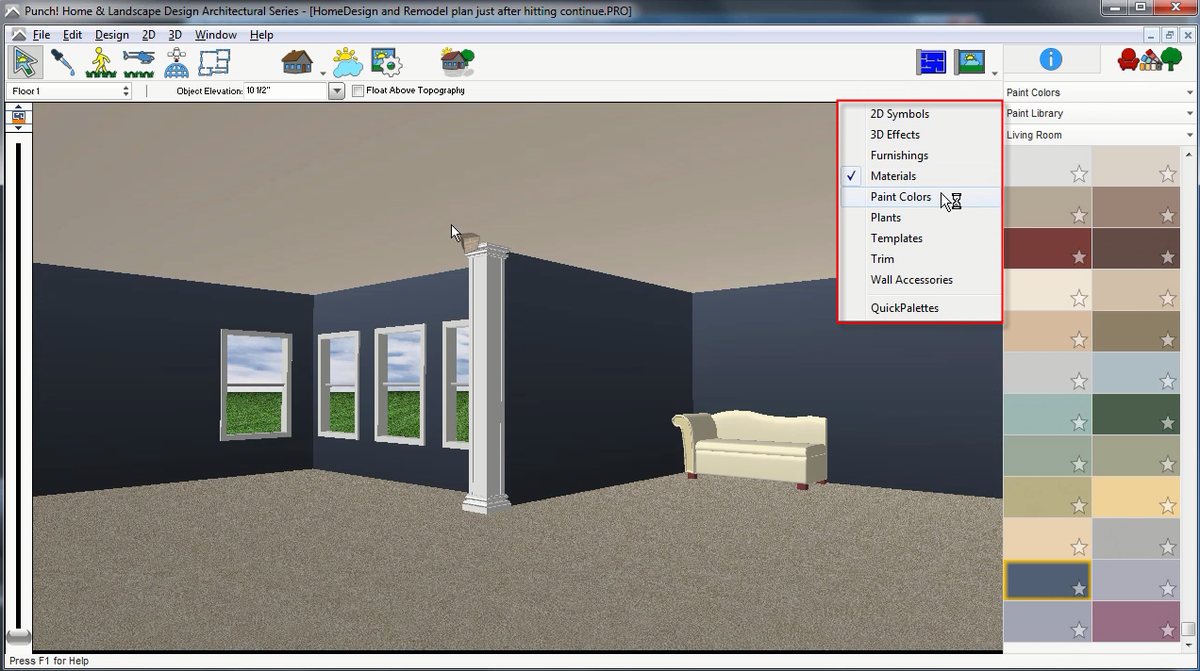
- On the Libraries tab, choose the colours library, then a category of paints.
- Drag a colour onto a wall in the 3D view and choose how to apply it from the menu that appears.